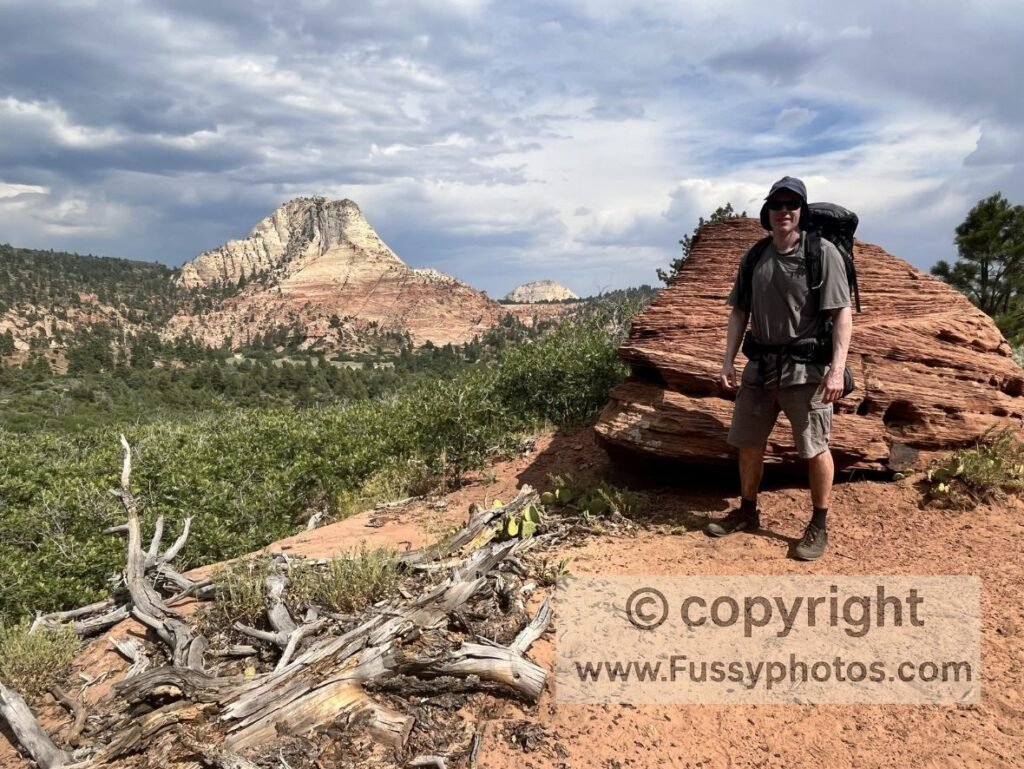
The Zion Traverse is a magnificent 37‑mile backpacking trip from La Verkin Creek to The Grotto in Zion National Park. It took us 2.5 days to complete, but with hindsight I’d recommend three nights to avoid rushing and to fully enjoy the experience. The route makes you work for your views — steep ascents, long exposed stretches, and hot, sweaty conditions. While there are natural springs along the way, many are unreliable depending on the season. Running out of water would be disastrous, so caching water along the route is the safest and most practical strategy.
If you’re still planning your wider Zion trip, my Zion National Park guide offers a full overview of the park’s regions and entrances. For route maps, campsite options, and itinerary comparisons, see my Zion Traverse Guide: Route, Itineraries and Planning Tips.
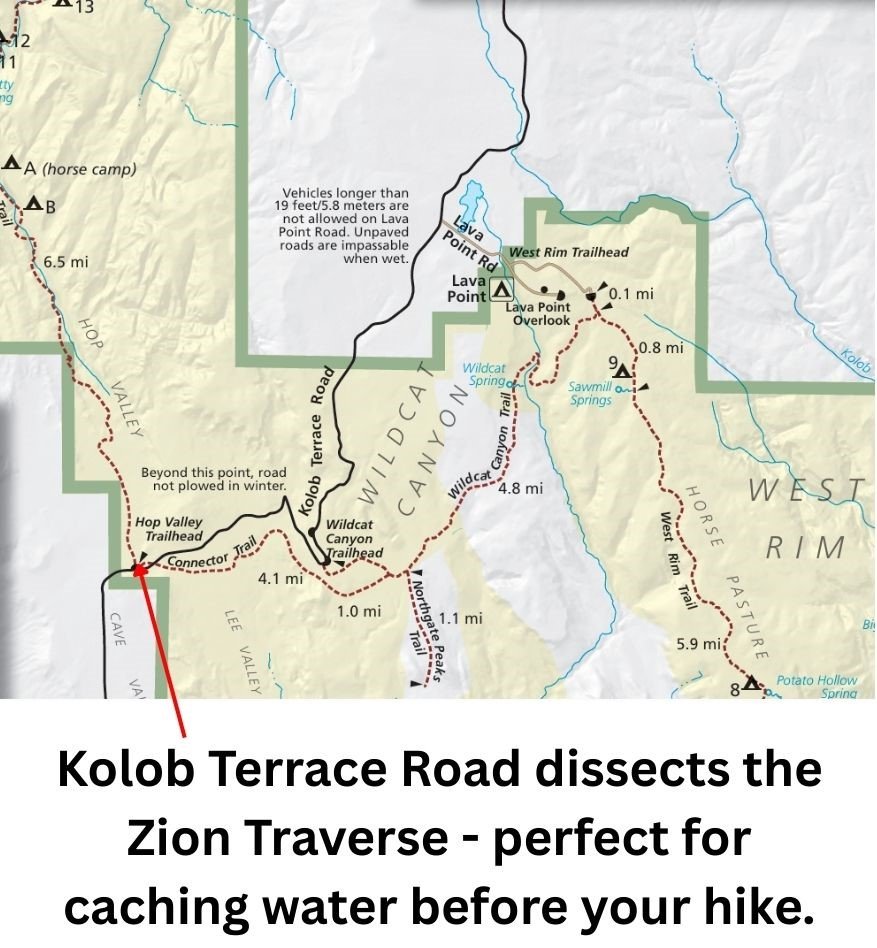
Original base map © National Park Service (public domain). Annotations by Fussyphotos (Jack).
What is caching water?
Caching water simply means leaving sealed bottles at safe, legal points along your route before you start your hike, so you can pick them up later when you need them.
Do You Need to Cache Water on the Zion Traverse?
In cooler, wetter months the springs along the trail are usually more reliable, and it’s worth asking a ranger for the latest update before you start. Just keep in mind that rangers are often making an informed guess — sometimes based on recent hiker reports, sometimes on their own observations. The longer it’s been since anyone checked those springs, the less accurate that information is likely to be. For that reason and your own peace of mind, water caching is a safety net in the cooler months and essential in the hotter, drier months.
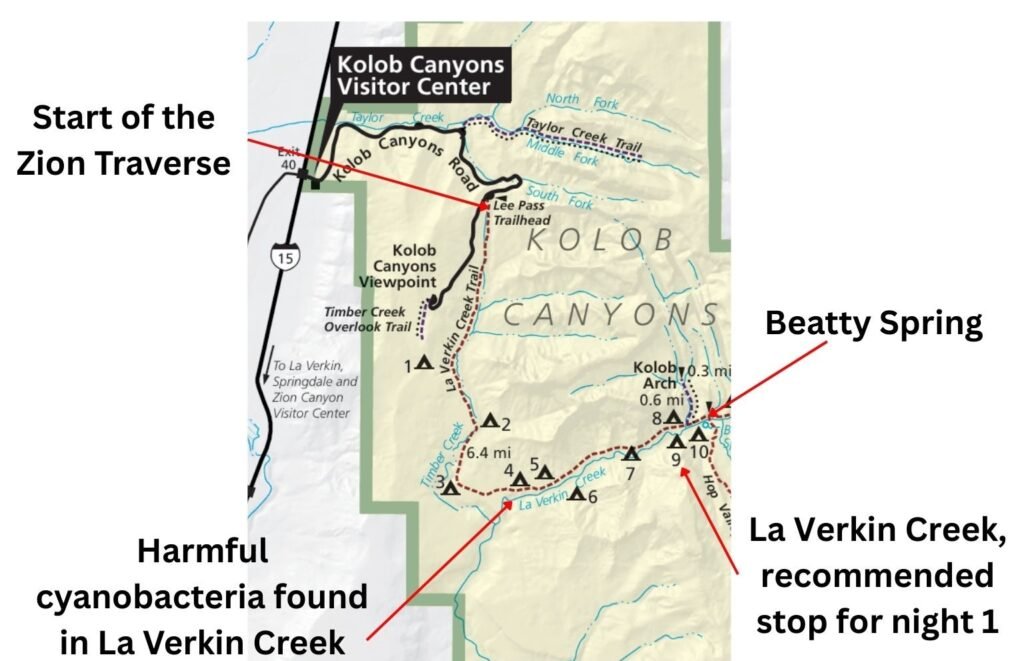
Cyanobacteria have been found in the North Fork of the Virgin River, North Creek, and La Verkin Creek. These toxins make the water unsafe to drink — even if filtered or boiled.
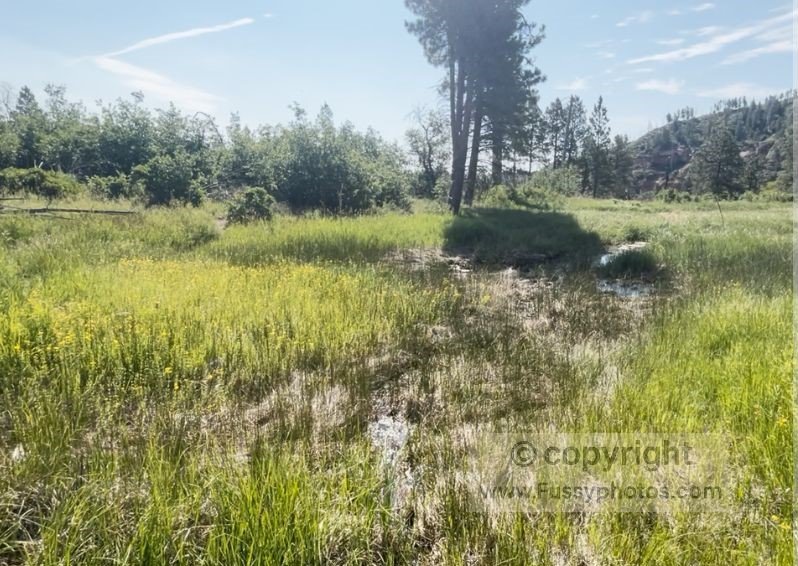
The first safe natural source you’ll encounter is Beatty Spring, 7 miles from La Verkin Creek Trailhead.
How Much Water You Should Carry and Cache?
The NPS recommends a minimum of one gallon per person, per day. This doesn’t account for heat, pack weight, or cooking needs. For safety, I recommend planning for 1.5 gallons per person, per day.
The problem is simple: the more you carry, the heavier your pack becomes — and the more water you’ll need. Caching water avoids hauling excessive weight over long distances.
Water Strategy for the start of the Zion Traverse
If Beatty Spring Is Reliable
If you’re confident Beatty Spring is flowing, begin with one gallon per person. The 7‑mile hike to the spring takes around half a day, with the final miles exposed to the sun. You cannot refill from La Verkin Creek due to cyanobacteria.
If Beatty Spring Is NOT Reliable
If you’re unsure whether Beatty Spring is flowing and plan to camp at La Verkin Creek, you’ll need enough water for:
- The half‑day hike to camp
- Cooking
- Washing (if desired)
- Breakfast
- The morning hike to Hop Valley Trailhead
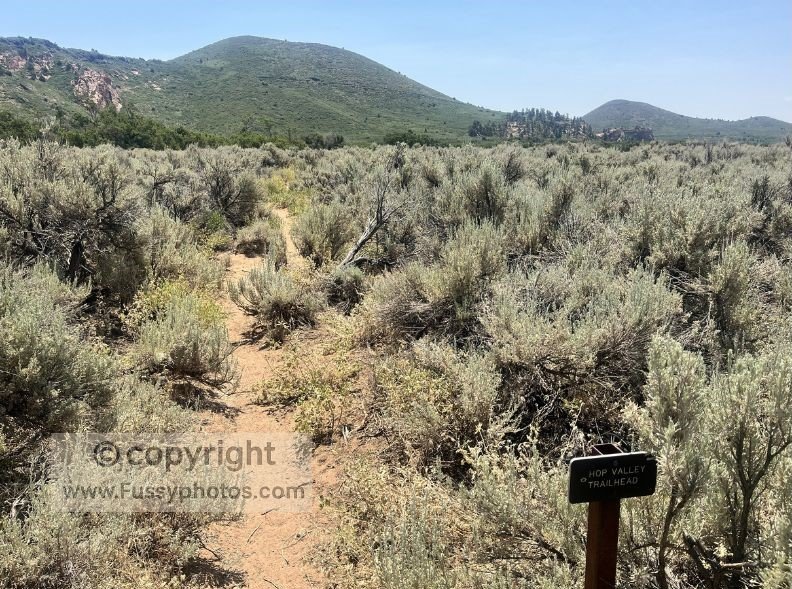
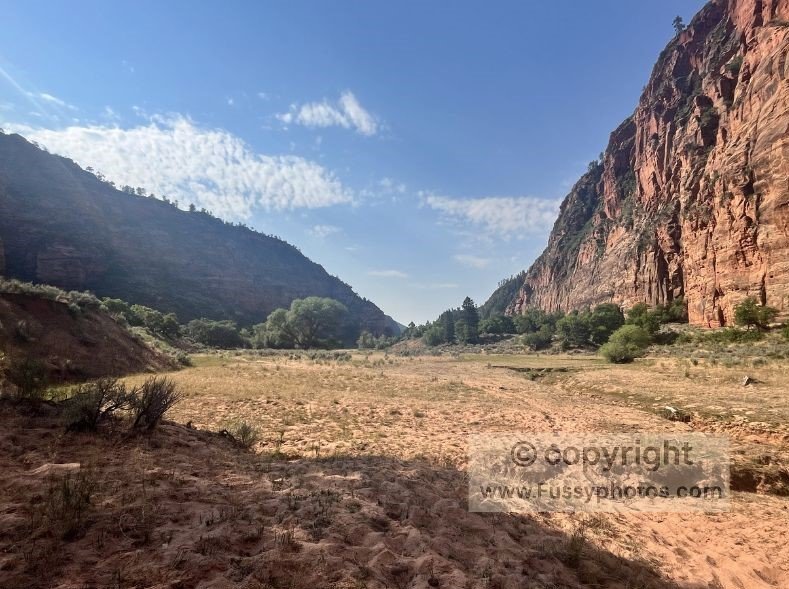
Hop Valley Trailhead is a further 6.5 miles from Beatty Spring, along the hot, sandy, and exposed Hop Valley Trail — don’t underestimate how hard this section can be, especially in the hotter months. It took us six hours to reach it in summer, and we got through a lot of water in the process. Beatty Spring was running at the time, thankfully, but that’s not something you can rely on.
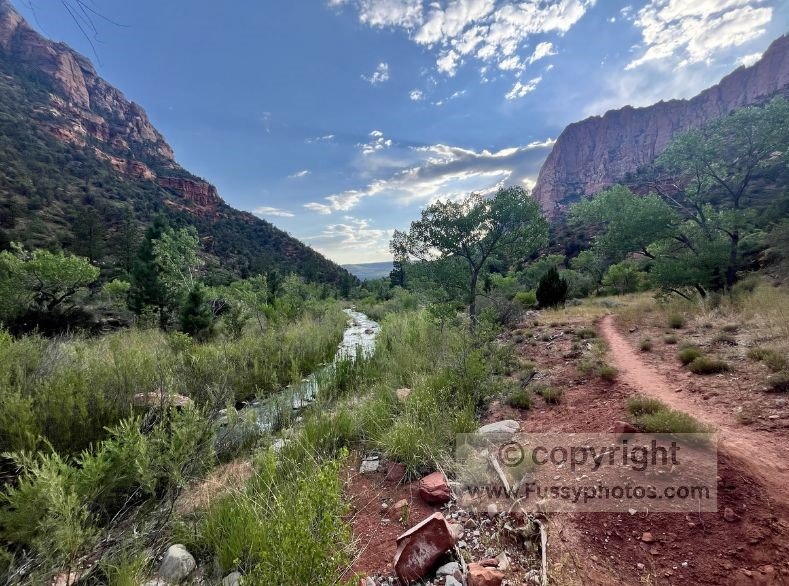
Here’s how the early section of the Traverse looks — note Beatty Spring, campsite options, and the cyanobacteria warning near La Verkin Creek.
Summary of Water Needs for Day 1 of the Zion Traverse
La Verkin Creek Trailhead → Beatty Spring (if Beatty Spring is reliable)
- Distance: ~7 miles
- Water available: Beatty Spring (if flowing)
- Recommended starting amount: 1 gallon per person
- Notes: Last few miles are exposed; you cannot refill from La Verkin Creek due to cyanobacteria.
La Verkin Creek Trailhead → La Verkin Creek Campsite (if Beatty Spring is NOT reliable)
- Distance: ~7 miles
- Water available: None
- You need enough water for:
- The half‑day hike to camp
- Cooking
- Washing (optional)
- Breakfast
- The morning hike to Hop Valley Trailhead
- Recommended starting amount: 2 gallons per person
La Verkin Creek Campsite → Hop Valley Trailhead
- Distance: ~6.5 miles
- Water available: None
- Notes: Hot, sandy, exposed; slow going. Expect high water consumption.
If you’re planning your full Traverse itinerary alongside your water strategy, my Zion Traverse Guide: Route, Itineraries and Planning Tips compares the main route options and helps you choose the right number of nights.
How to Cache Water on the Zion Traverse
- Pick up your permit before placing any caches. If you’re still choosing campsites or working out daily mileage, my Zion Traverse Permit Guide: How to Book Campsites walks through the Recreation.gov process and helps you match campsites to your water plan.
- Write your permit number and date on each bottle with a marker.
- Drive to the appropriate trailhead and hide the labelled bottles out of sight of other hikers.
- Take a photo of the exact spot for reference later.
- Mark the location on your GPS so you can easily find it again.
- Place bottles in shade if possible to keep them cool.
- Keep the cache away from animal trails and secure it so it won’t roll or blow out of place.
Recommended Water Cache Locations
Once you reach Hop Valley Trailhead, expect to be running low. There are pit toilets here, but no running water.
Cache Water at Hop Valley Trailhead
Kolob Terrace Road crosses the Traverse here, making it the ideal place to cache your first bottles.
From Hop Valley, the route continues 8.9 miles northeast via the Connector Trail and Wildcat Canyon Trail (11 miles if you include the Northgate Peaks Trail side trip). Unless you’re pushing big miles in cooler months, you’re unlikely to reach the West Rim Trail in a single day. If you plan to camp at‑large along Wildcat Canyon, you may not pass a single water source all day.
You’ll need to cache enough water for:
- Half a day’s walking from Hop Valley Trailhead to Wildcat Canyon
- Cooking
- washing (if desired)
- breakfast
- The morning hike until you reach water at either Wildcat Spring and/or your West Rim Trailhead water cache
- Suggested water cache: 1 – 1.5 gallons of water per person
Cache water at West Rim Trailhead
On my own Zion Traverse, we didn’t cache water here — but with hindsight, we absolutely should have. Sawmill Springs was a longer detour off the trail than we’d anticipated, adding extra distance unless you plan to camp there. By the time we reached the next two springs, Potato Hollow Spring and West Rim (Cabin) Spring, we were already low on water and could only coax a trickle from both. We ended the hike rationing water, which is far from ideal in the summer months.
You’ll need a water cache for:
- A full day’s hike from the West Rim Trailhead to The Grotto Trailhead
- Or 1.5 days if camping on the West Rim Trail
If camping, add water for:
- Cooking
- Washing (optional)
- Breakfast
- The morning hike into Zion Canyon
Suggested cache amount:
- 1 gallon per person (finishing same day)
- 1.5–2 gallons per person (if camping)
Summary of Water Needs for the West Rim Trailhead Cache
If You’re Finishing the Traverse That Day (West Rim → The Grotto)
- Distance: A full day’s hiking
- Water available: Only unreliable springs (Sawmill, Potato Hollow, West Rim Cabin)
- You need enough water for: The entire descent into Zion Canyon
- Suggested cache: 1 gallon per person
If You’re Camping on the West Rim Trail (1.5 Days Remaining)
- Distance: Afternoon/evening hike to camp + next morning’s descent
- Water available: Same unreliable springs
- Suggested cache: 1.5 + gallons per person (lean toward the higher end)
When a Second Cache May Not Be Necessary
If you’re hiking in cooler months, it’s worth checking with a ranger — you may not need this second cache, but it’s still a useful peace‑of‑mind option regardless.
This map shows key water sources and cache points between Hop Valley Trailhead and the West Rim Trailhead — including Wildcat Spring, Sawmill Springs, and optional detours.

Summary of Water Needs for This Section
Hop Valley Trailhead → Wildcat Canyon (at‑large camping zone)
- Distance: ~6-8 miles depending on where you camp
- Water available: None
- You need enough water for: Hiking, cooking, washing (optional), breakfast, and the next morning’s miles.
Wildcat Canyon → Wildcat Spring
- Distance: ~3–4 miles depending on where you camp
- Water available: Wildcat Spring (seasonal and unreliable)
Wildcat Spring → West Rim Trailhead (optional detour)
- Distance: ~2 miles out and back detour
- Water available: Only if you cached water at the trailhead
Wildcat Spring → Sawmill Springs (if not detouring to West Rim Trailhead)
- Distance: ~3 miles
- Water available: Sawmill Springs (1‑mile round‑trip detour; often low)
Natural Water Sources Beyond the West Rim Trailhead
Once you pass the West Rim Trailhead, the final stretch of the Zion Traverse offers only a few natural springs — and most are unreliable, especially in summer. These may help in cooler months or high‑flow years, but they should never replace a water cache. If you want something shorter and more manageable than the full Traverse, the West Rim Trail covers the final 14 miles of this route into Zion Canyon, and my West Rim Trail: Top‑Down vs Bottom‑Up guide explains how to hike it as a standalone trip.
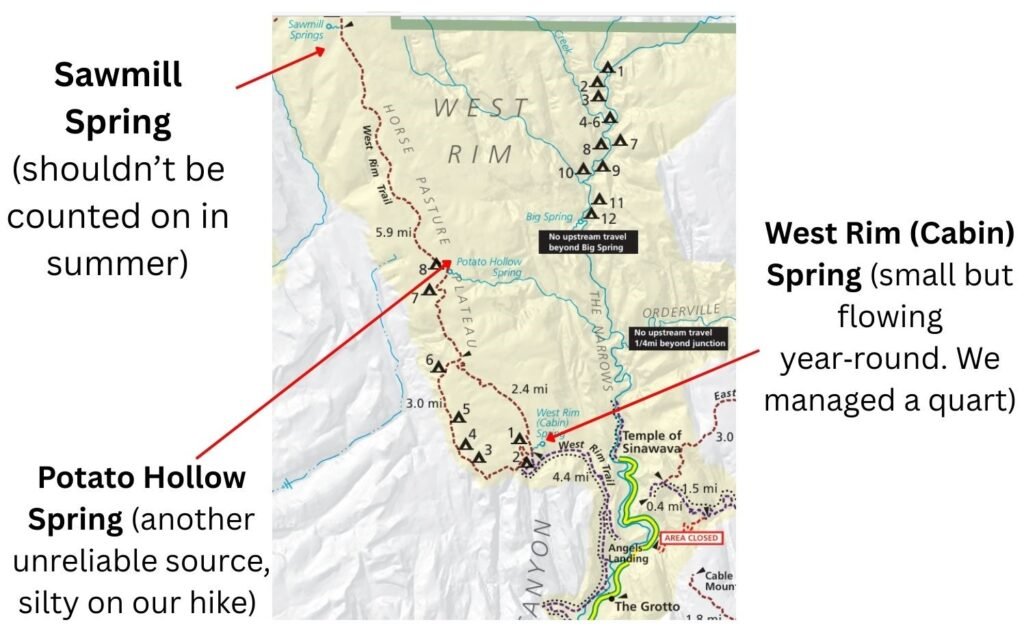
This annotated map shows the final water sources along the West Rim Trail — including Sawmill Spring, Potato Hollow Spring, and West Rim (Cabin) Spring — with campsite markers and trail distances to help you plan your final day.
Natural Water Sources on the Traverse
Beatty Spring
Typically reliable throughout the year. You’ll find it where the trail crosses La Verkin Creek, between campsites 10 and 11.
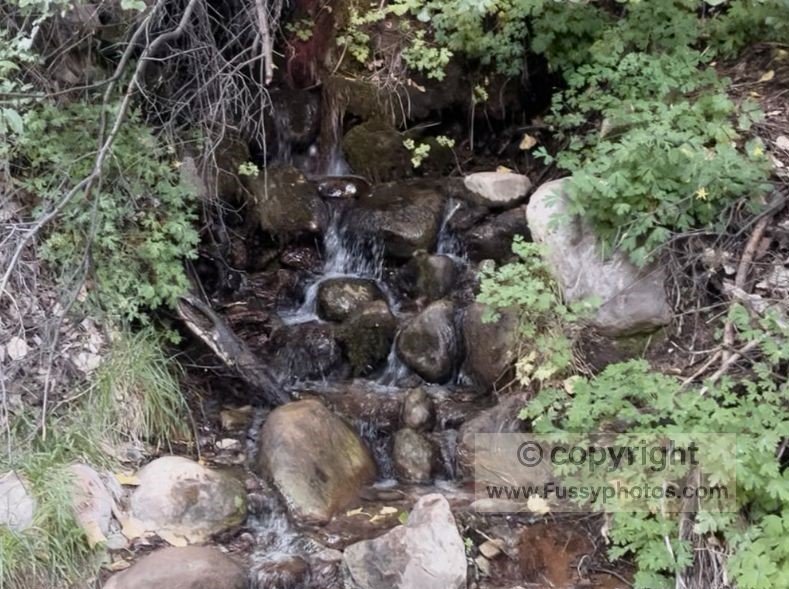
Wildcat Spring
Often just a small trickle, but it tends to run most of the year. It sits on the north side of the Wildcat Canyon Trail, roughly 1.5 miles before you reach the junction with the West Rim Trail.
Sawmill Springs
This one dries up early — usually by the start or middle of summer — so it shouldn’t be counted on. It’s located near campsite 9 on the West Rim Trail.
Potato Hollow Spring
Another unreliable source that’s often dry by mid to late summer. It’s close to campsite 8 on the West Rim Trail.
West Rim (Cabin) Spring
Generally offers a small but flowing year‑round – we got just a quart from it. You’ll find it near campsite 2 on the West Rim Trail.
Final Thoughts on Water Caching for the Zion Traverse
Planning your water strategy is the single most important part of preparing for the Zion Traverse. With the right caches in place and a clear understanding of which springs you can rely on, the route becomes far more enjoyable — and far safer.
My 4 Essential Water Safety Tips for the Zion Traverse
- Cache before you hike.
- Don’t rely on ranger estimates.
- Carry more than you think.
- Treat water caching as mandatory in the hotter months
If you’re building your full itinerary, my Zion Traverse to Angels Landing guide walks through the route day‑by‑day, and my Zion National Park guide covers the wider park so you can plan the rest of your trip with confidence.
Video: How to Avoid Running Out of Water on the Zion Traverse

Zion Traverse Water Strategy FAQs
Do you need to cache water on the Zion Traverse?
Yes — in most conditions, caching water is essential. Springs are unreliable, distances are long, and summer heat makes running out dangerous. Even in cooler months, caching provides peace of mind.
How much water should I carry each day?
Plan for 1.5 gallons per person, per day. This covers drinking, cooking, and the extra water you’ll burn carrying a full pack in exposed terrain.
Is Beatty Spring reliable?
Beatty Spring is usually the first safe natural source on the route and often flows year‑round, but it can run low in late summer. Never assume it’s guaranteed.
Can I drink from La Verkin Creek or the Virgin River?
No. Cyanobacteria have been found in La Verkin Creek, North Creek, and the North Fork of the Virgin River. These toxins are unsafe even if filtered or boiled.
Where are the best places to cache water?
The two most important cache points are Hop Valley Trailhead and West Rim Trailhead. Both are road‑accessible and perfectly positioned for the longest dry stretches.
Are there reliable springs on the West Rim Trail?
Most are unreliable in summer. Sawmill Spring and Potato Hollow Spring often dry up. West Rim (Cabin) Spring usually has a small flow, but only enough for a top‑up.
How hot does the Zion Traverse get in summer?
Temperatures regularly climb into the 90s–100s°F (30s–40s°C). The Hop Valley and West Rim sections are especially exposed, and water consumption rises sharply.
Can I complete the Traverse without caching water?
Only in rare, cool, high‑flow periods — and even then, it’s risky. Most hikers should treat caching as mandatory.